How to Protect Your Privacy on Mac
Please note that these instructions may not apply to all Mac devices and operating systems.
Follow these easy steps to protect the personal data on your device running macOS or Mac OS X.
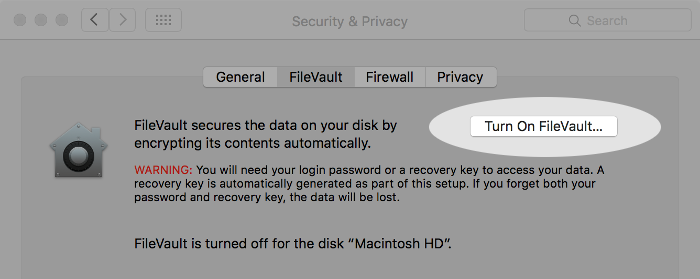
1. Easily encrypt your Mac with the built-in FileVault.
Turn FileVault on to make your files are unreadable if someone else gets hold of your computer while powered off or locked.
How: System Preferences > Security & Privacy > FileVault
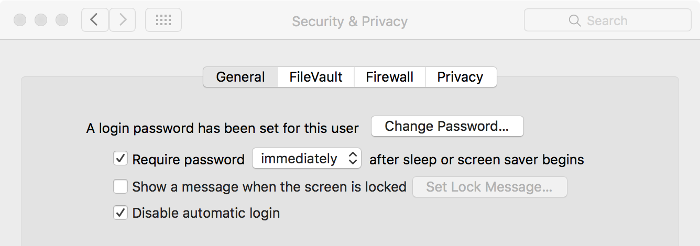
2. Set a password for your account and disable automatic login.
Remember to require your password after your Mac sleeps and of course, use a strong, lengthy password. Note that Disable automatic login has been removed from macOS Sierra.
How: System Preferences > Security & Privacy > General
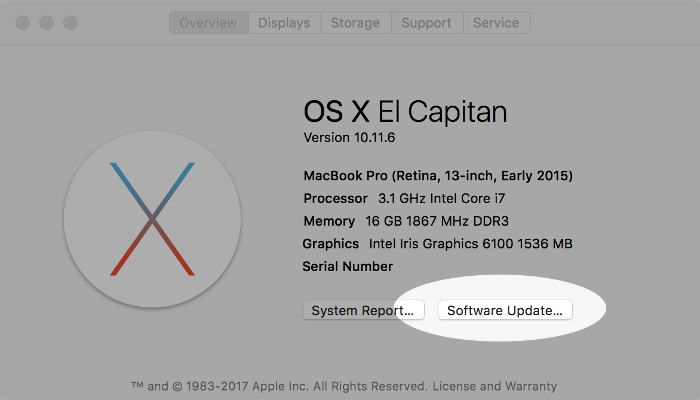
3. Update macOS regularly.
Don’t ignore those installation prompts! Remember you can check for updates at any time.
How: Apple icon > About This Mac > Software Update
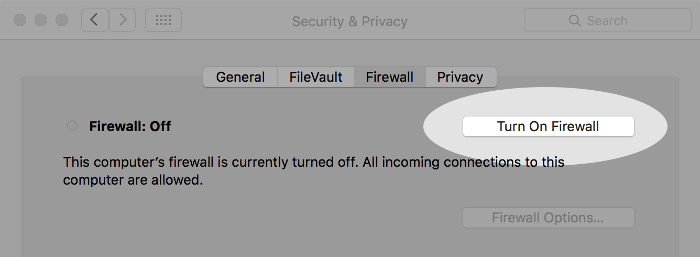
4. Make sure the firewall is turned on.
Enabling the built-in firewall will block incoming connections. You can also choose to allow only signed software to accept incoming connections under Firewall Options.
How: System Preferences > Security & Privacy > Firewall
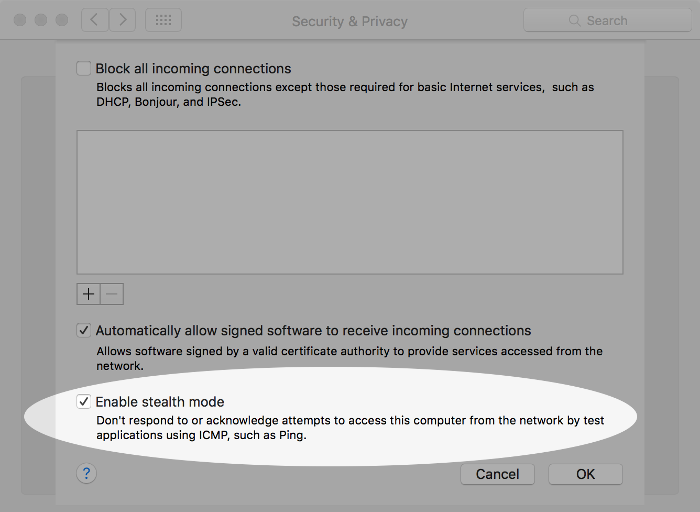
5. Enable stealth mode.
Being in stealth mode means your Mac will not respond to connection attempts from the network.
How: System Preferences > Security & Privacy > Firewall > Firewall Options
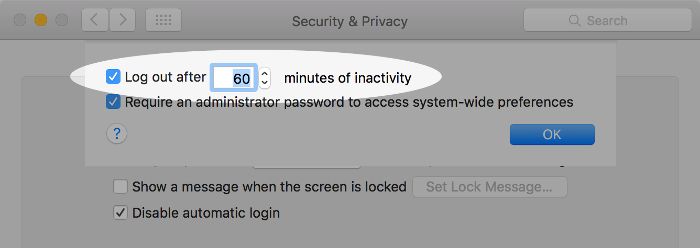
6. Set the computer to log out after a period of inactivity.
The default for automatic logout is 60 minutes but shorter is better.
How: System Preferences > Security & Privacy > General > Advanced
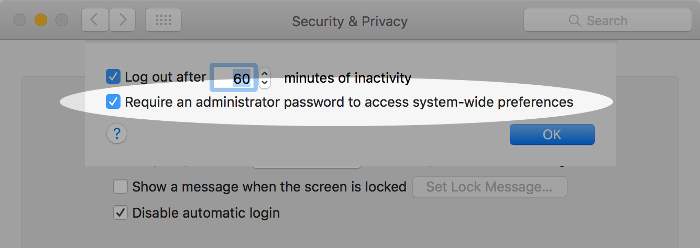
7. Require an admin password for system-wide changes.
This helps protect against malware doing widespread damage.
How: System Preferences > Security & Privacy > General > Advanced
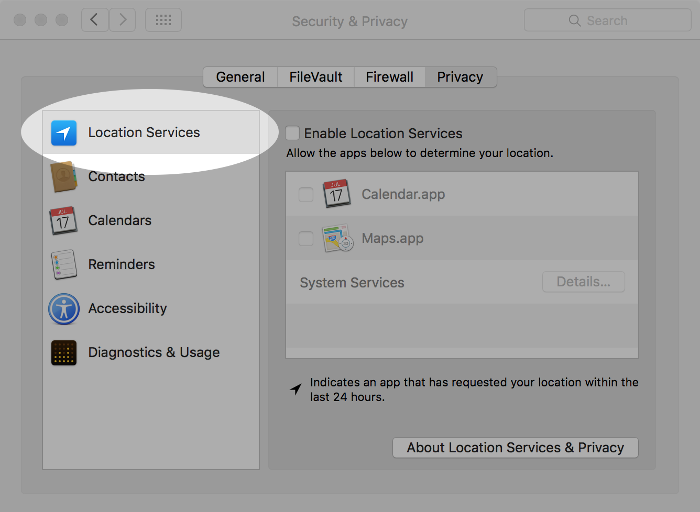
8. Control which apps are accessing your location.
Verify what’s using your location data and disable any location services you don’t need.
How: System Preferences > Security & Privacy > Privacy > Location Services
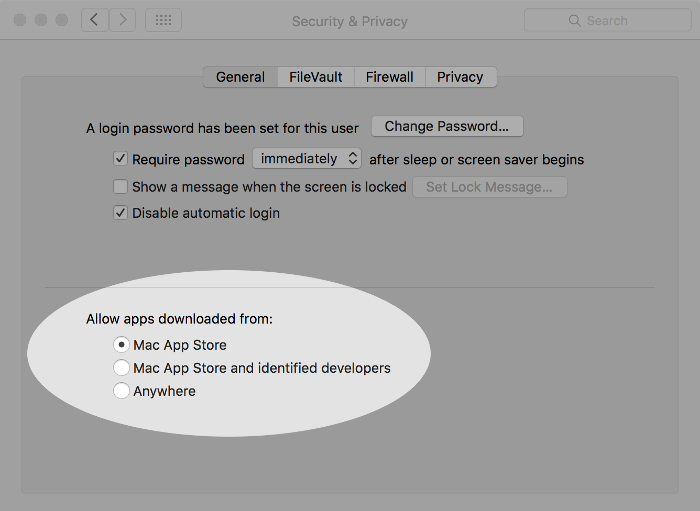
9. Restrict which types of apps are allowed to run on your Mac.
For more protection, grant permission only to the Mac App Store.
How: System Preferences > Security & Privacy > General
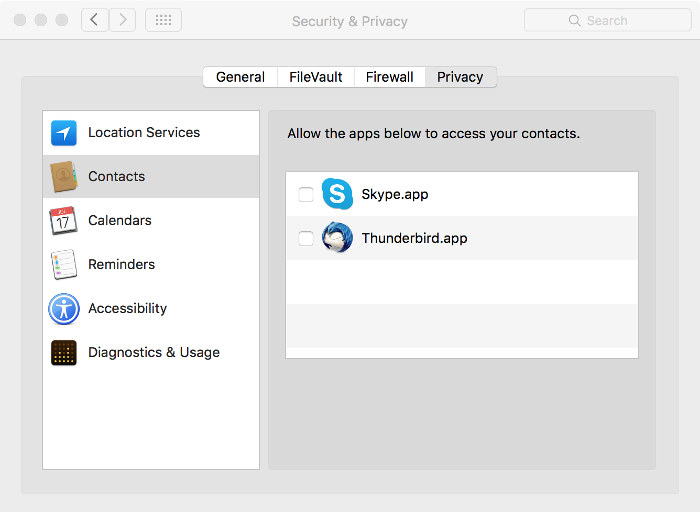
10. Review which apps have access to sensitive data.
In particular, protect personal data such as your contacts and calendar info.
How: System Preferences > Security & Privacy > Privacy
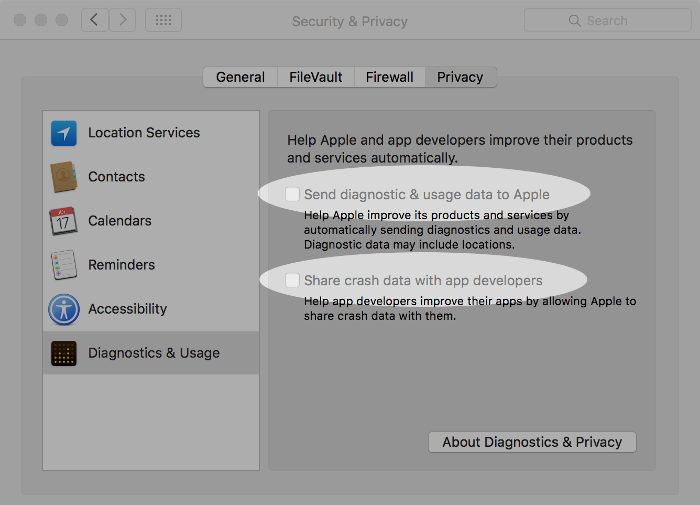
11.Stop sending diagnostics and usage data.
This data can include information such as the apps you use and your location.
How: System Preferences > Privacy > Diagnostics & Usage
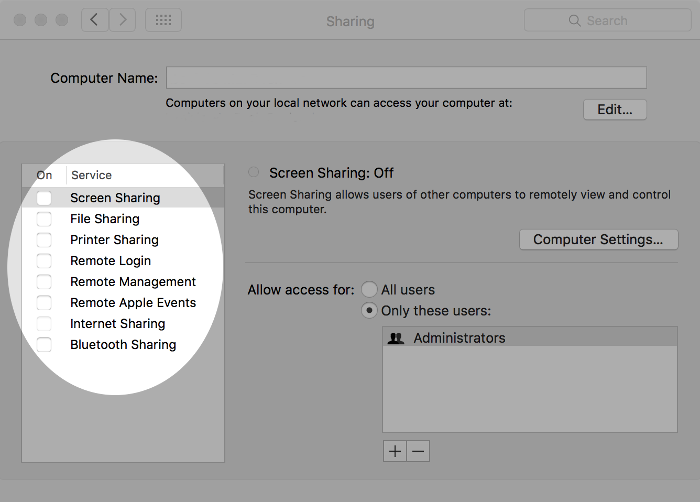
12. Check which sharing services are enabled.
Disable things like screen sharing, file sharing, printer sharing, remote login, etc. unless you’re sure you need them.
How: System Preferences > Sharing
13. Get the DuckDuckGo browser – and make it your default.
Want to go a step further? Fast, free, and packed with useful features, the DuckDuckDuckGo browser offers everyday privacy without sacrificing convenience. Unlike most other browsers, the DuckDuckGo browser has privacy built right in, including...
- A private search alternative to Google that doesn't spy on your searches.
- A best-in-class tracker blocker that blocks cookies and other trackers, including the ones powering invasive ads that might otherwise follow you around.
- More than a dozen other privacy- protecting features that add up to a more pleasant web browsing experience.
How: Get the free DuckDuckGo browser at www.duckduckgo.com/browser.
Congratulations! You’ve just taken a big step to increasing privacy and protecting the data on your Mac. If you’d like to delve further, we recommend this in-depth technical guide.
For more privacy advice follow us on Twitter, and stay protected and informed with our privacy newsletter.
